My wife and I went on a holiday trip to Cyprus in 2009 with our dearest friends Atin & Ruth and we were amazed by discovering that even small flats have a wood fired oven in their tiny balconies. We always wanted to have one as in Colombia clay ovens are used to make local delicacies (mainly made out of corn) varying from region to region, so this summer after spending some time doing research we decided that it was time to be brave and make one for our garden. We started by looking at prefabricated ovens that we could assemble and customize but the cheapest basic shell was around £350 and it was ugly & too small! Then we explored the idea of buying one as a kit and we realised that they are too expensive and have a too-clinical look that we didn’t want to go for. Then we stumbled upon some diy ovens and decided to build it from scratch!
THE PLANNING

First of all try to do this in good weather! This summer in the UK was brilliant and we had long spells of dry weather so we could make quick progress with all the work that an oven needs.
I read everywhere that you need to decide first on an internal size, meaning how many pizzas you want to cook at the same time. A 70cm diameter seemed a good size for the fire to sit on one side and be able to cook two 30cm pizzas (12″ in an obsolete language!). Then you need to decide the shape and the refractory material for your oven. We went for a conventional igloo shape in clay as it is easier to mould and you don’t need any special tools to put it together. After the clay dome we decided to go for a 25mm Ceramic Fibre Blanket and another 25mm Vermiculite Concrete layer and a 12.5mm sand & cement mortar. The Brick arch has to be (according to numerous blogs) in height 60-65% lower than the internal height of the dome and the width needs to be no smaller than the width of your pizza peel for obvious reasons!
Here is a list of all the materials used so far
- 6 1×1.2m Pallets (one with plywood) £6
- 6 Heavy Duty Castor Wheels (60kg/ea) £20
- 75mm wood screws (many)
- 10x10cms Posts (recycled) £0
- 42 Old Red Bricks (recycled) £38
- 7 15kg Sand Bags (10 would be better if not using bricks, see Dome section) £3ea
- Used newspaper sheets £0
- 100 Kilos of Pizza Oven Clay (www.pottersconnection.co.uk) £110
- 4m x 0.6m Ceramic Fibre Blanket (www.vitcas.com) £25
- Refractory Cement Glue £14
- Chicken wire mesh (recycled) £0
- 1 Vermiculite Bag (100Lt) £25
- 1 Cement Bag (25Kg) £6
- 1 125mm diameter x 50cm Black Enamel Pipe £20
- 1 125to100mm Black Enamel Reduction £10
- 1Lt Masonry Paint (recycled) £0
- Wood Stain (optional) recycled £0
- 1 125mm diameter Chimney Cowl £17
Total £312 approx!
and some of the tools & accessories you’ll need
- Electric Drill
- Electric Saw or Jigsaw
- Spirit Level
- Plastic & fabric gloves
- Knife (to cut the dome opening)
- Fire wood (kindling)
- Matches (I used a cooking flame torch!)
- Any other accessory that you feel is needed for health & safety
THE BASE

I started by fixing six heavy duty castor wheels (60 kilos load capacity each) and then fixing with screws the pallets one on top of the other until getting the required height (six pallets). I had some 10x10cm posts as a left over from a fence job so I formed a frame to contain the oven floor construction consisting of one layer of 25mm Ceramic Fibre Blanket, sand blinding and reclaimed old red bricks. Once the bricks are in place (arranged in the best fit possible) fill all the gaps with more sand until all the floor is firm and tight. Make sure the brick floor is as level as possible.
THE CLAY DOME

Once we had our base ready we started the serious part, the dome! I realised that the amount of sand I needed to form the dome template was too much, so I placed a tower of bricks (always aware of how I was going to take them out at the end!) and then we started throwing handfuls of sand and shaped them in a 70cm diameter by 35cm high dome. When the dome was finished we applied a layer of wet newspaper sheets (many bloggers are correct about this step, it is a bit difficult at first…). Now the clay. We got ours after extensive research from a place in internet that offered the cheapest delivery fee but if you are adventurous and have free available clay and grog to play with, you might save more than £100! For me, this clay was excellent, it had a smooth consistency and it was evenly mixed throughout and as a result all the layers stuck firmly together and you know that all the clay is going to form a uniform structure. I let it dry in open air for 4 hours, and then using one of the templates for the arch (if you have made them in advance), I cut an opening with a large knife and started scooping out the sand and carefully removing the bricks until all the inside was empty. I peeled the newspaper (the most I could!), cleaned the excess of sand and then let it dry overnight.
THE FIRST FIRE

The next morning we started the first fire…saw in many blogs how to “properly” set up the wood and it really worked! always form a raft of wood sticks leaving a gap at the bottom to allow air to flow under the fire. Once it was lit, I pushed the fire to the centre and kept feeding the fire for about 4 to 5 hours. I could see the water from the clay evaporating, it was exciting to see how everything was happening in the way it should be according to other people’s experiences!
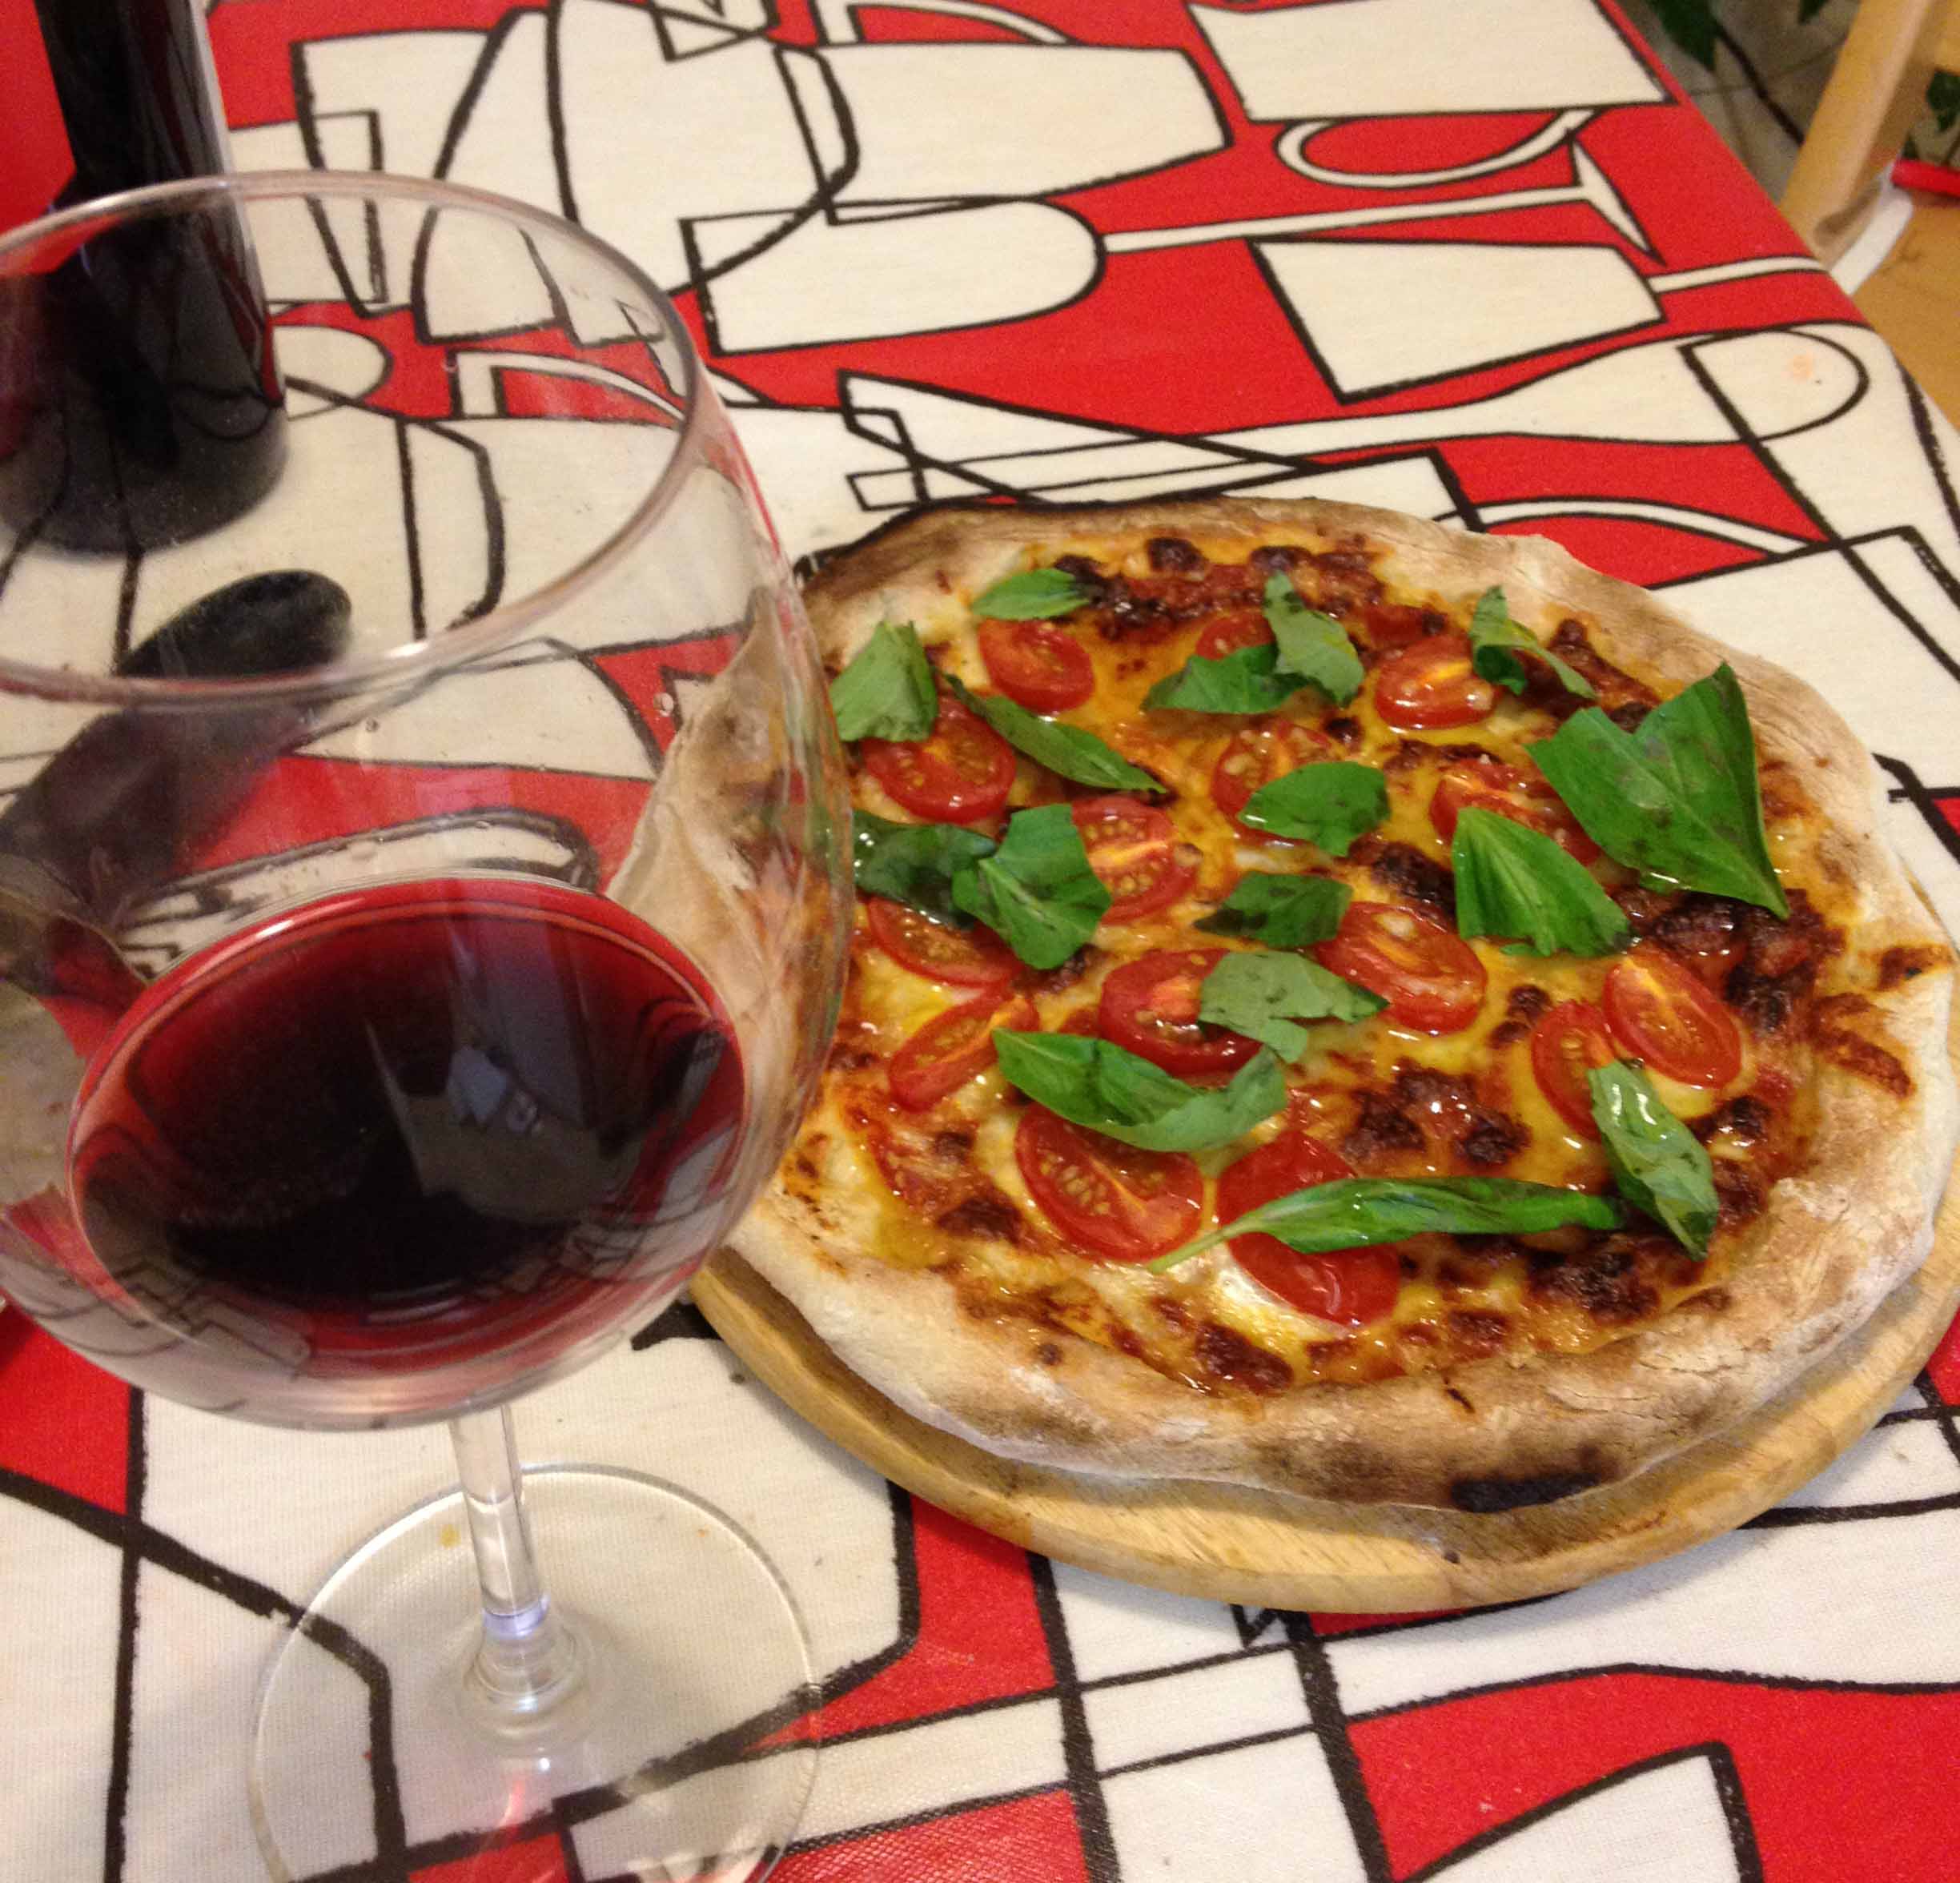
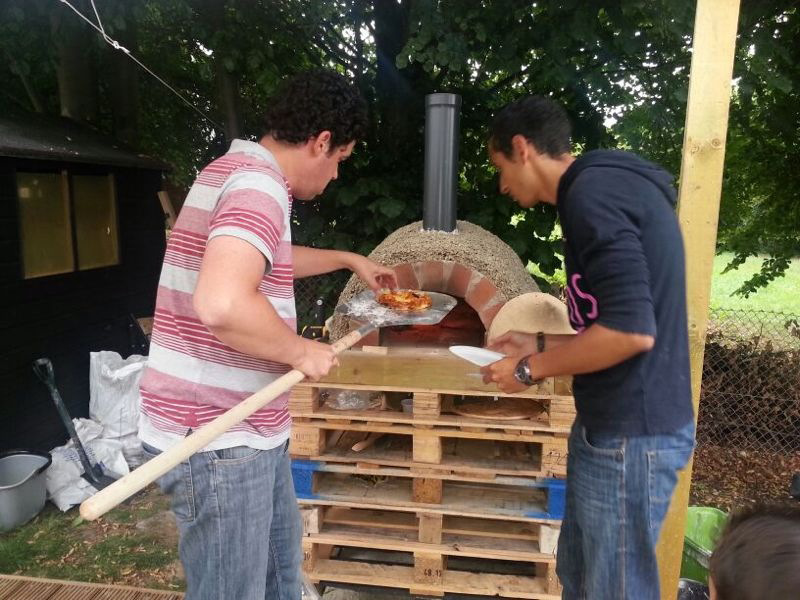
For obvious reasons we couldn’t resist to try the newly formed dome and made our very first pizzas!!! They took about 20min each but they tastes delicious (I’ll post some pictures later). The problem was that although it was really hot inside and the fire was constant, the clay was letting a lot of the heat to disperse out so the dome wasn’t reaching the required temperature to cook a pizza in 2min. This was the confirmation that a good insulation was needed!
THE BRICK ARCH
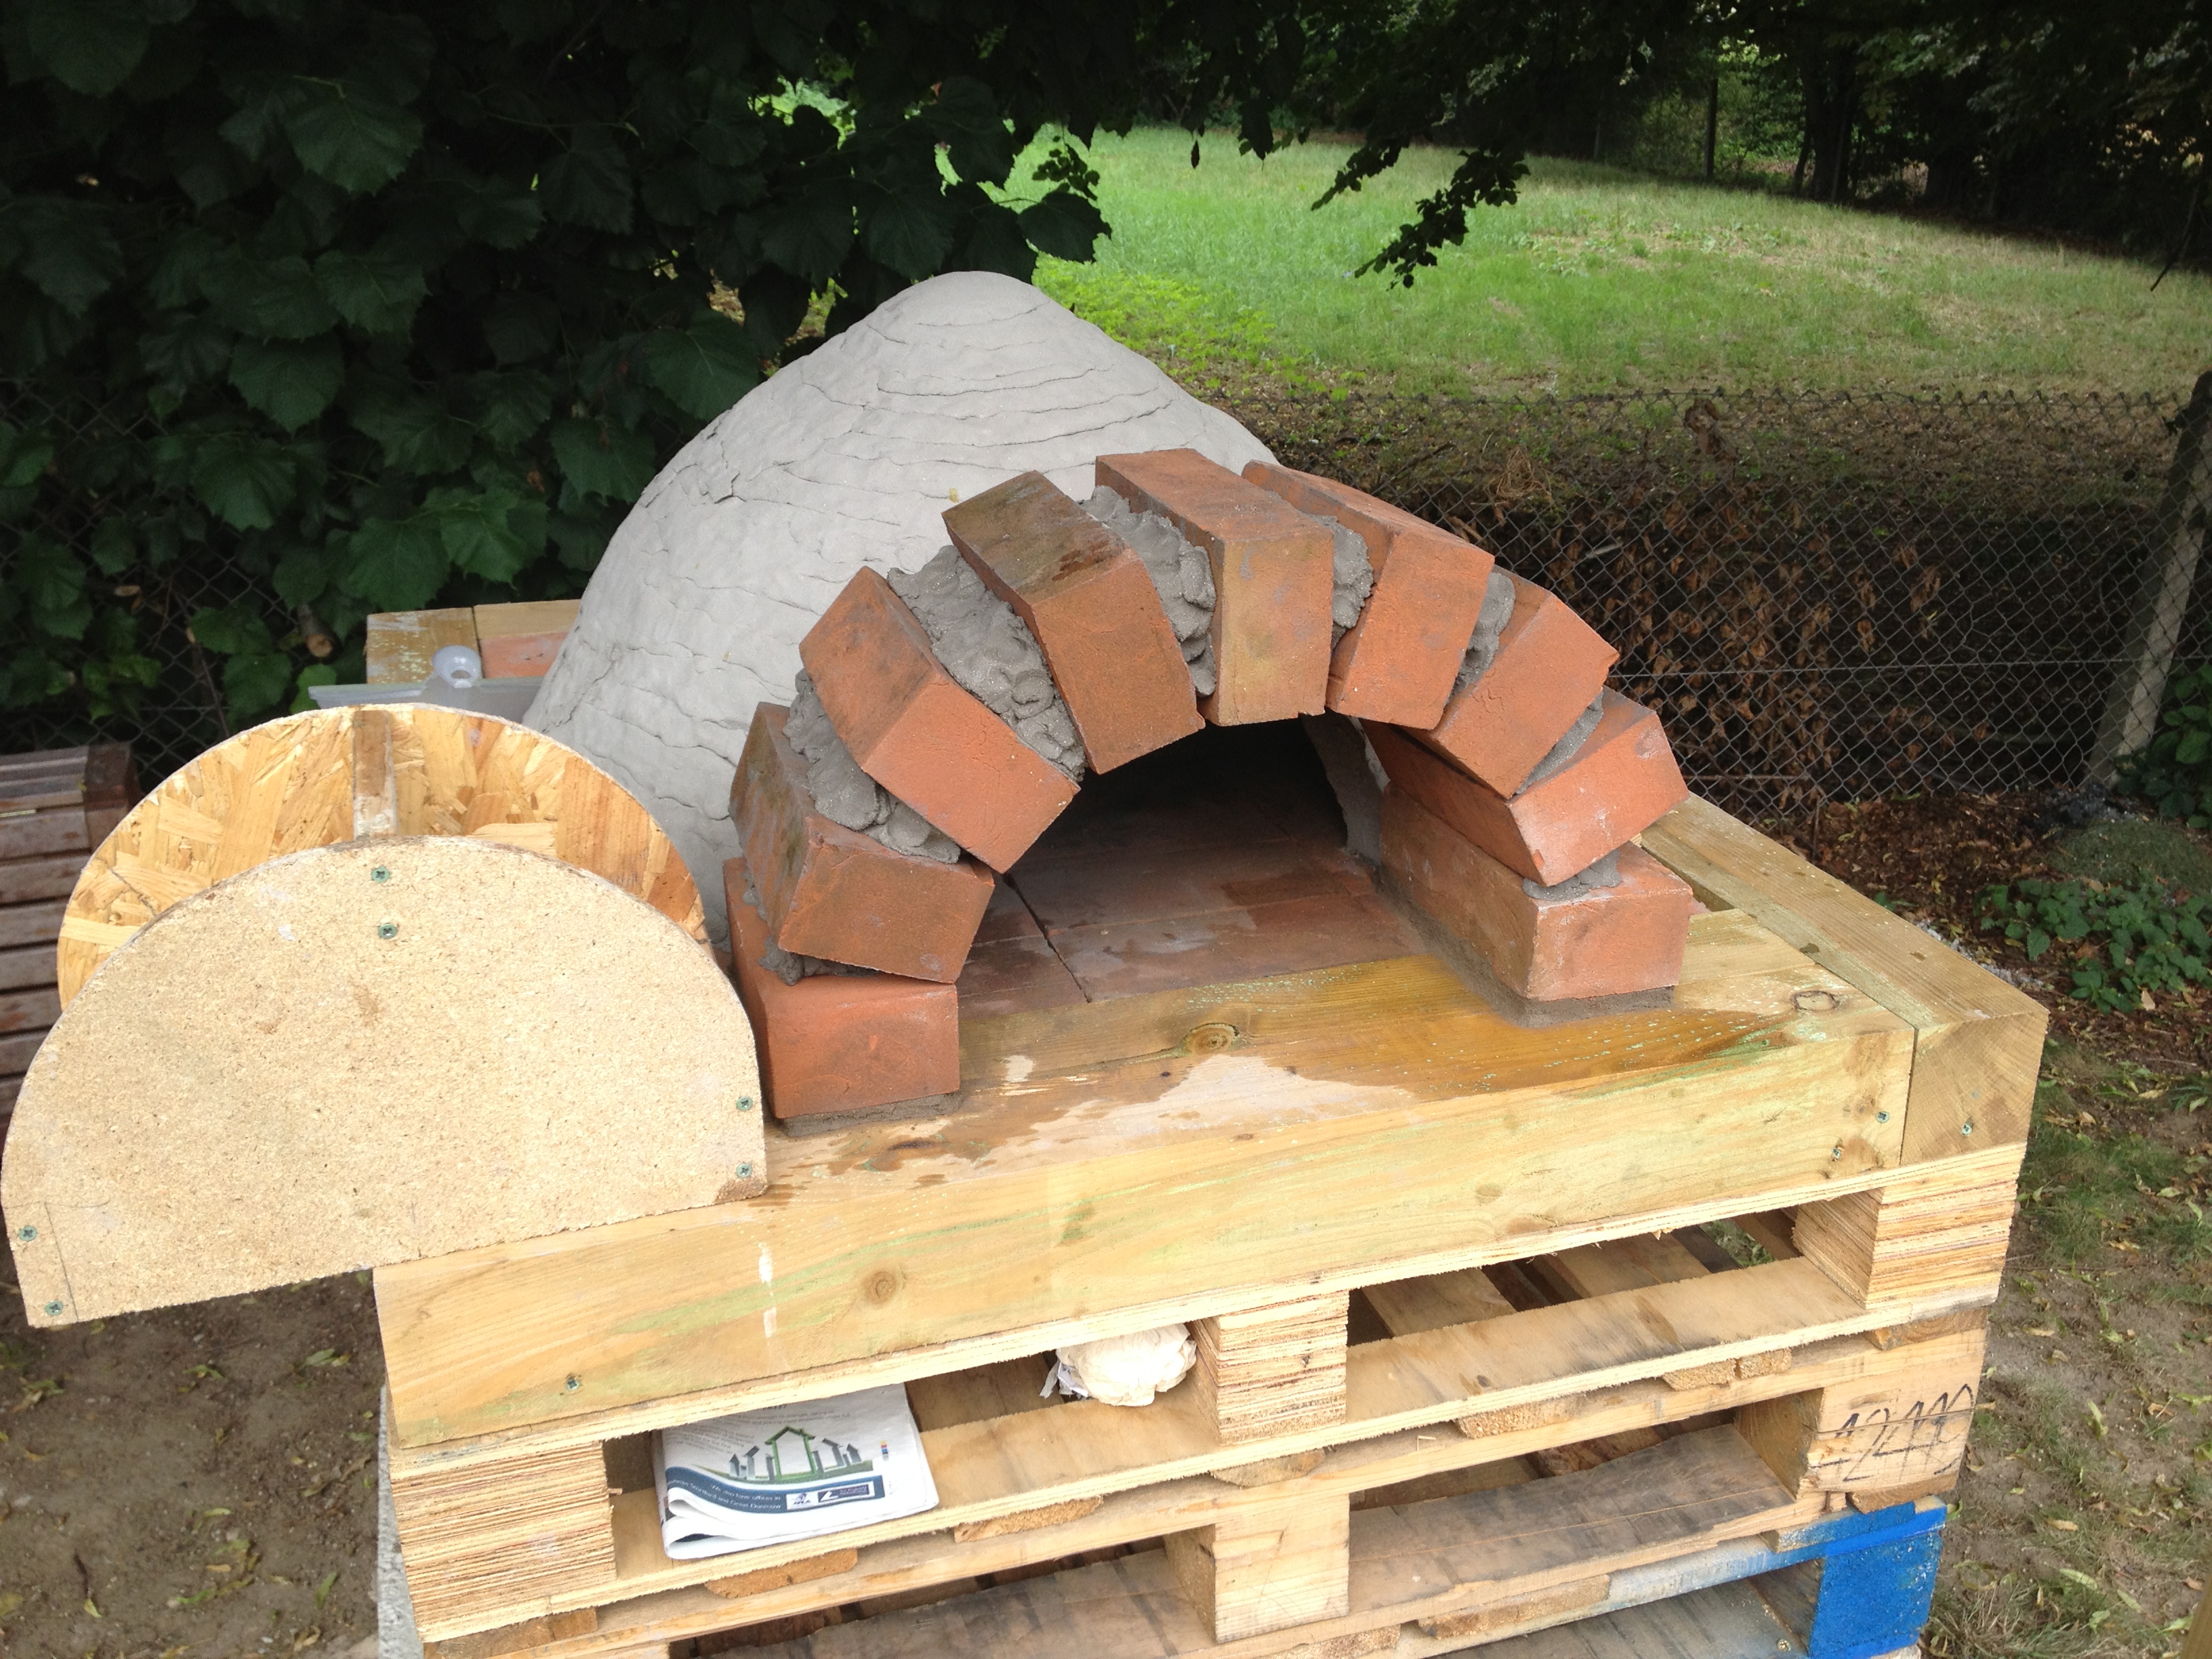
Next step, the arch! I made a template with two pieces of chipboard, some wood sticks and screws. I laid the first two pricks either side and started laying the other bricks following the template’s shape. I used some clay to position the bricks in the arch form (avoiding the use of wedges) and then I filled the remaining gaps with a mortar mix. It was easier than I thought and not too messy. I took off the wood template and let it dry a bit before the next stage.
THE FLUE

This is when all those years of making architecture models in Uni paid off…I got a 125mm (5″) pipe (black enamel used for wood burning stove flues) and a reduction from 5″ to 4″ from a local building merchant. I placed the reduction in the gap between the clay dome and the brick arch (making sure that it was level) and started applying more clay closing the gap around the reduction. I inserted a pair of long screws in the reduction holes burying them into the clay to reinforce the union between the reduction and the clay. I also inserted other long screws from each of the gaps of the brick arch into the new clay infill, in this way the arch will have a fixing to the clay minimising the risk of cracks due to expansion and contraction. I started another fire session (about 2 hours) to check that the chimney was working and the flow of air and smoke was adequate, inspected any movement in the clay infill and filled any gaps with more clay. Now it is ready for the vital part of the process!
THE INSULATION
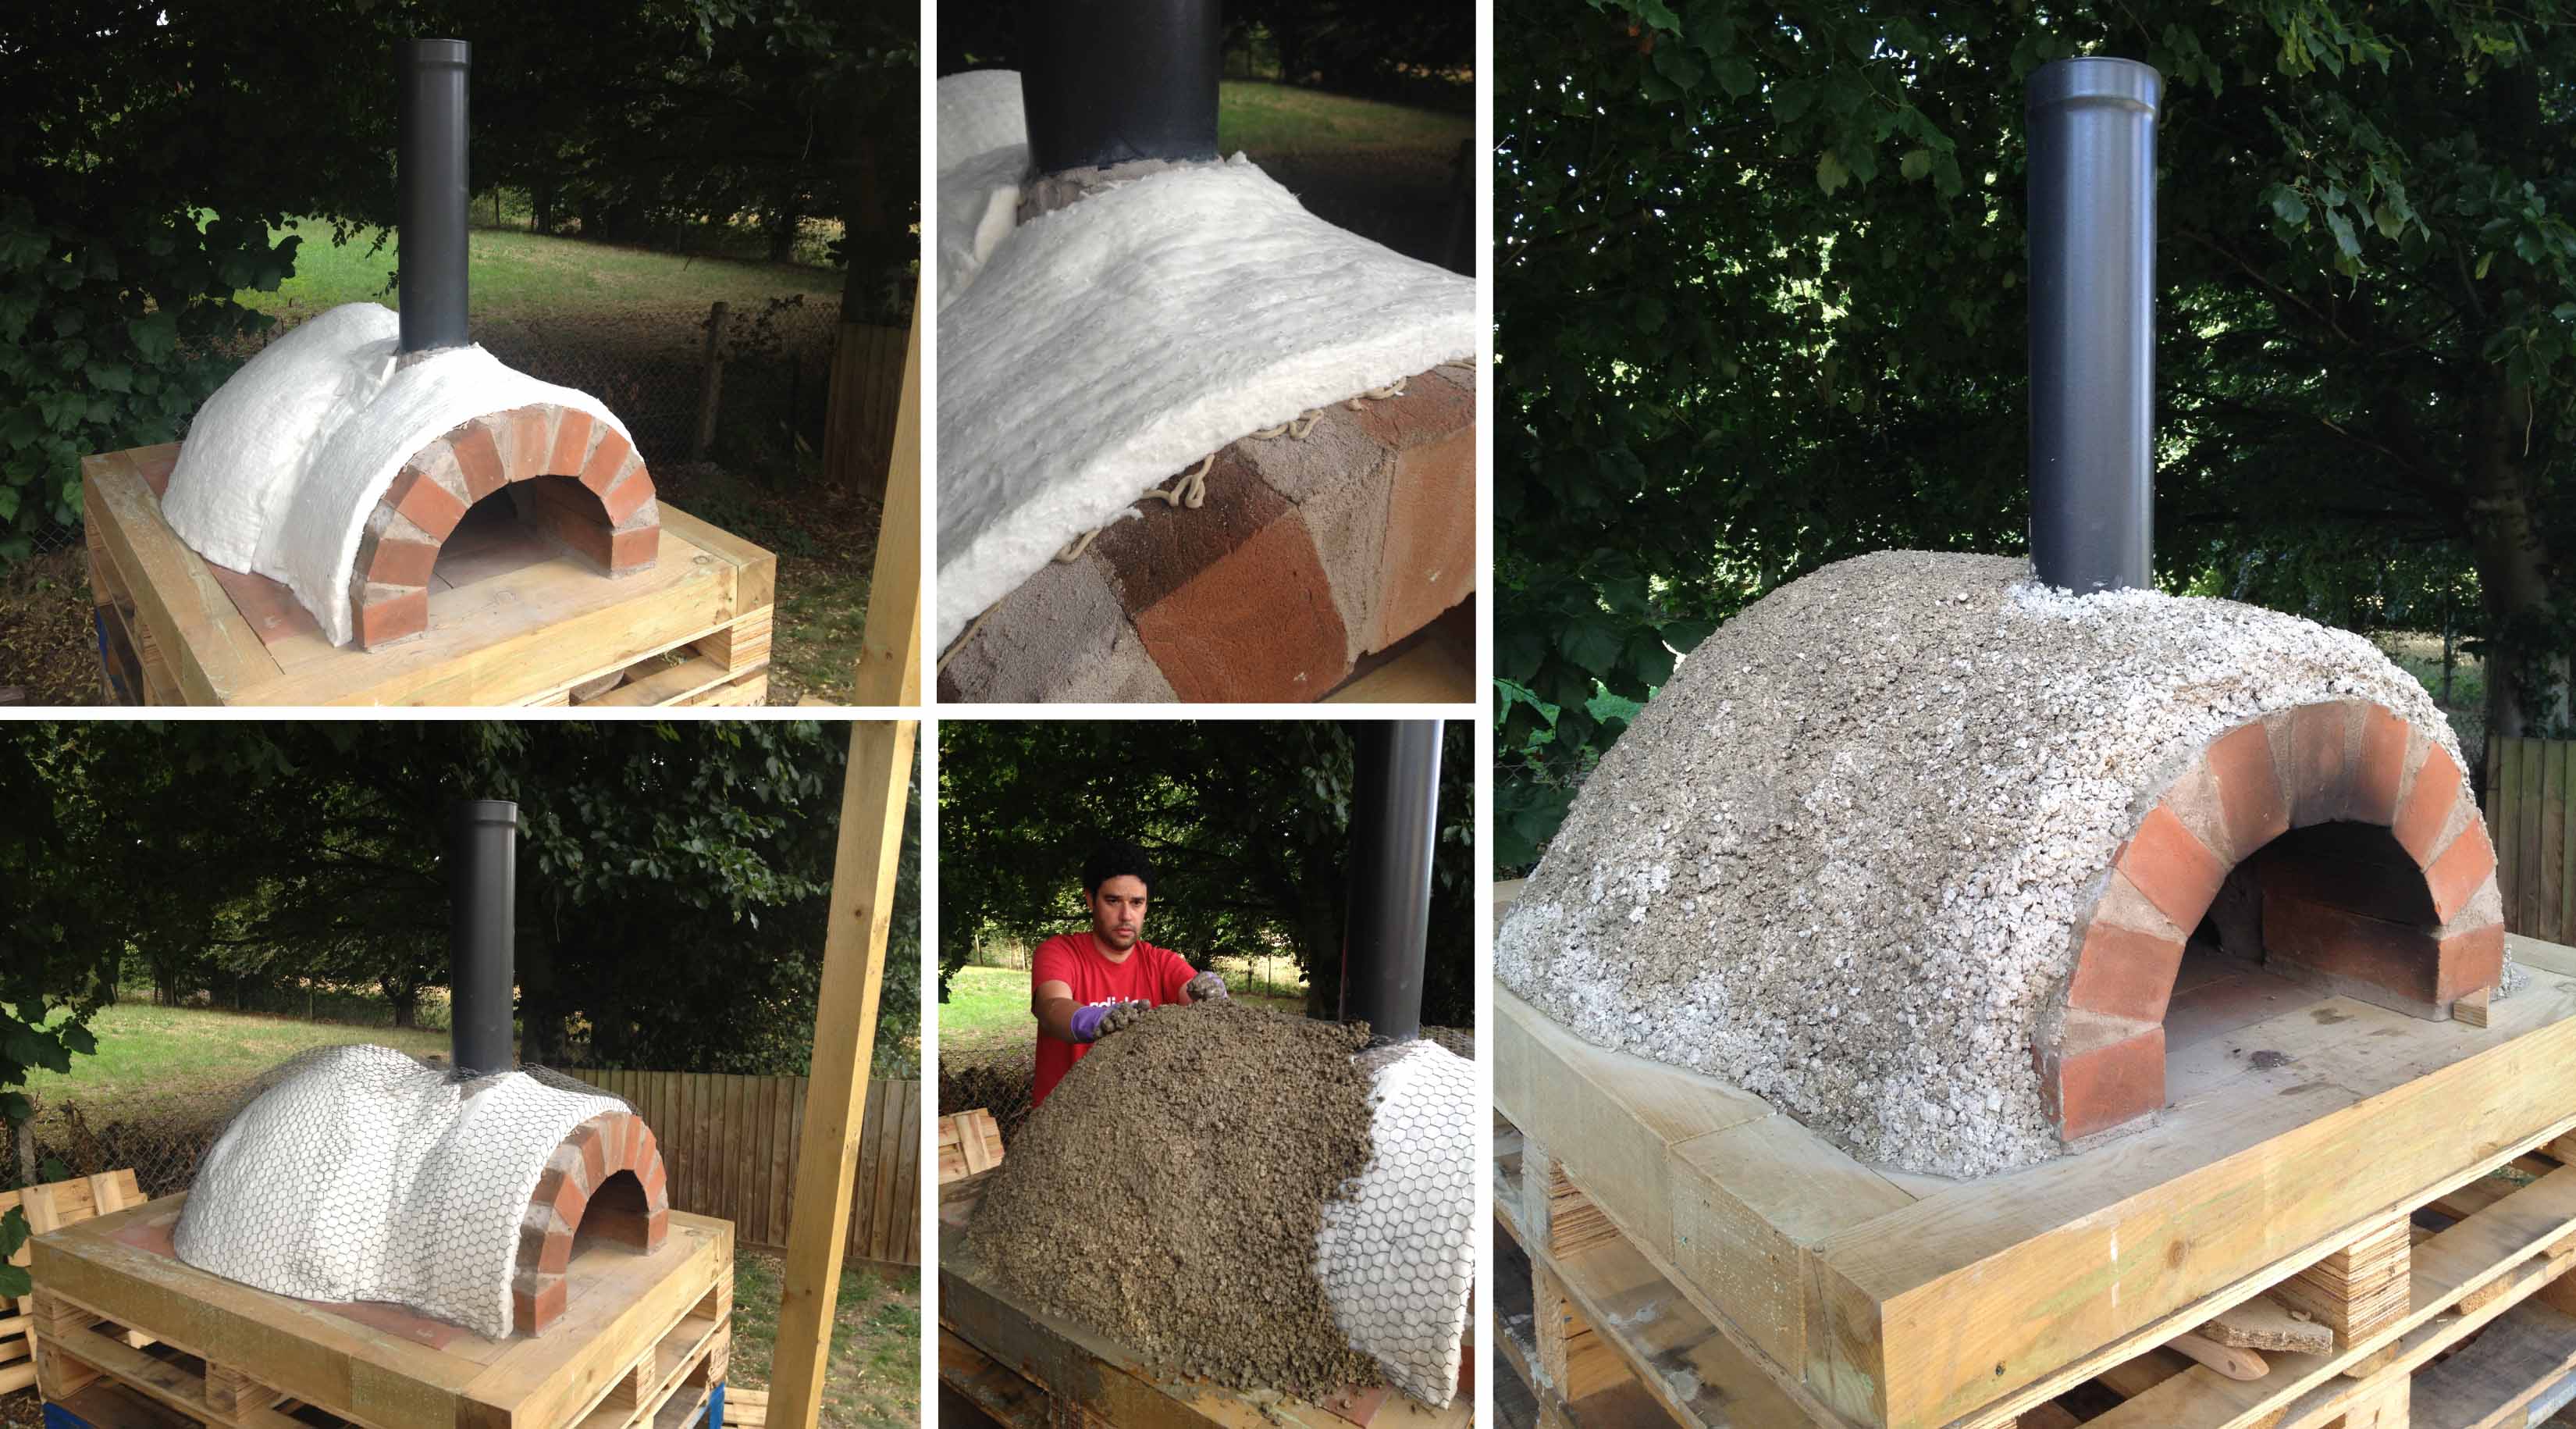
If you want delicious & quick pizzas and not waste money in fuel, then you cannot skip this part! I’ve got four metres of ceramic fibre balnket and the refractory cement glue from Vitcas. Basically I just made my dome comfy! wrapped the blanket around making sure every gap was covered. Then I put some chicken wire around it. When it came to the Vermicrete (Vermiculite & cement) I used a ratio of 6:1 (six parts of Vermiculite to one part of cement), believe me, everyone has a different opinion over this part and no one seems to agree on what is best, so I decided to go for something in between. You might choose a different ratio, but this one works very well! After another pizza session the vermicrete dried completely and you could put your hand outside directly on top of where the fire was inside and it felt between 25-28°C (I’m not bothering with farenheit!)
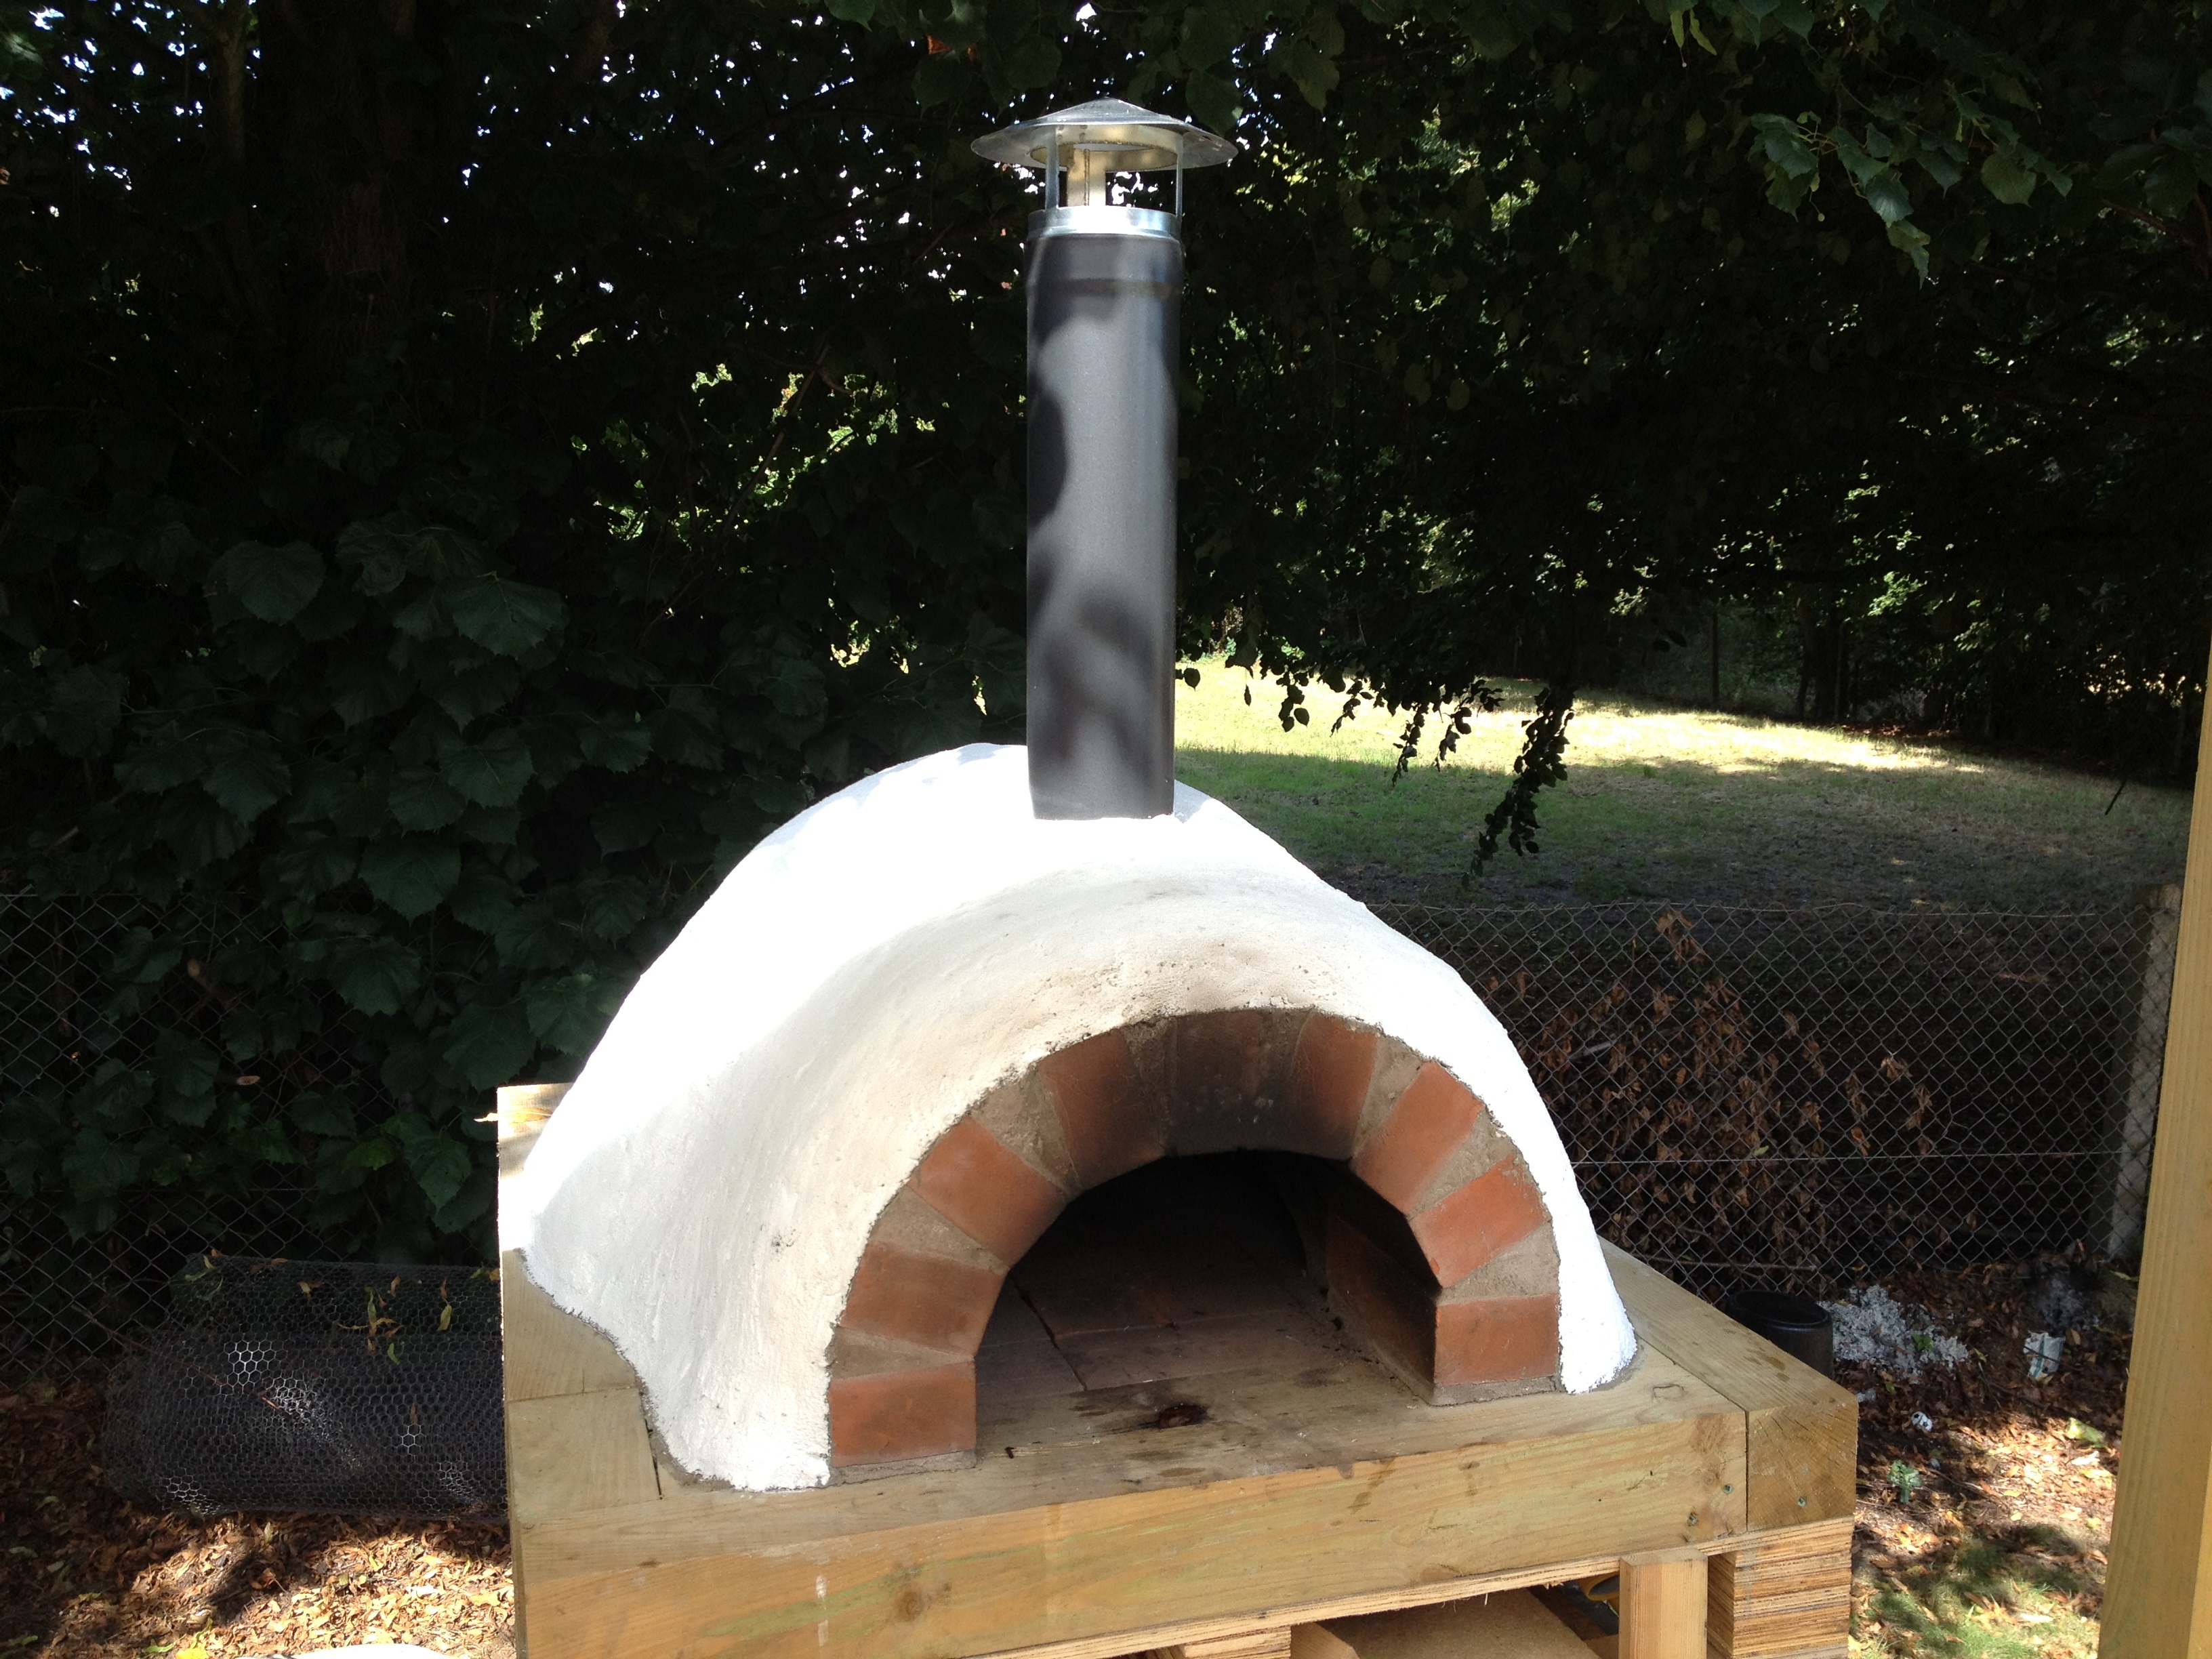
THE RENDER, PAINT & COWL

This was the easiest part, just got some cement, mixed it with sand (1:3 ratio) and added some water. I put some gloves and had fun sculpting the oven!! I got some masonry paint from a neighbour and painted the rendered parts. I then bought a 5″ chimney cowl and placed it on top. I found out that sometimes the cowl is not very practical as it stops the flow of smoke upwards so sometimes I take it off, although it looks better with it at the top!
THE DOOR
Work in progress…not too much progress, apart from gathering all the materials…I need a good weekend for this. In the meantime, I’m using one of the sides of the arch template raised in two wood sticks to allow fresh air to go inside. Will update when ready!
THE OVEN IN ACTION
Our first attempt to make pizzas was really enjoyable but slow as the oven didn’t have any insulation at that point, but the rest worked perfectly! The flow of smoke and air was good and the fire was going round the internal dome shape…our daughter was asleep and we opened a glass of wine…can’t ask for more!!


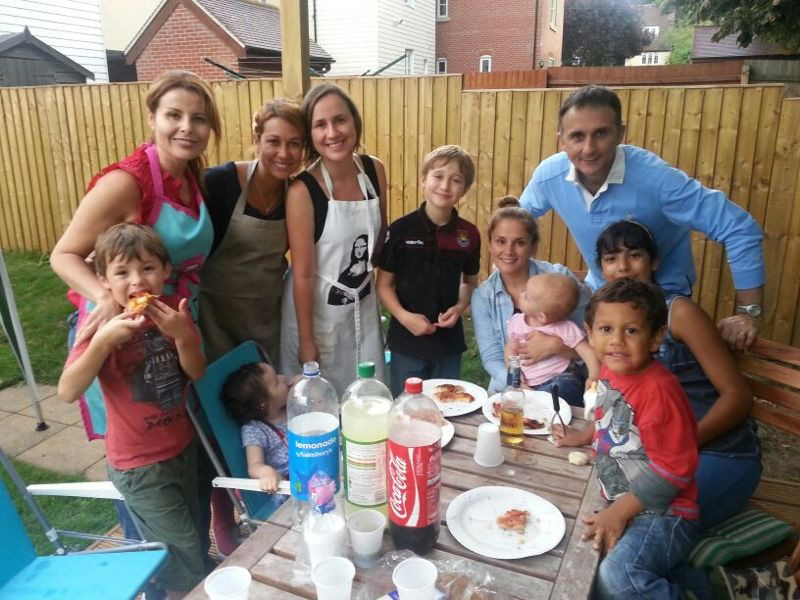


with my brother and sister in law!


Great work Emlyn!!! I like your blog and of course even more the oven. Your blog is very informative. Congratulations!!! Now, I will be waiting to taste these delicious pizzas that you have mentioned above 🙂
Thanks Ana, Its just a start…hugs.